


Valkenheide Stud

Y E A R V - S U M M E R
Tutorials


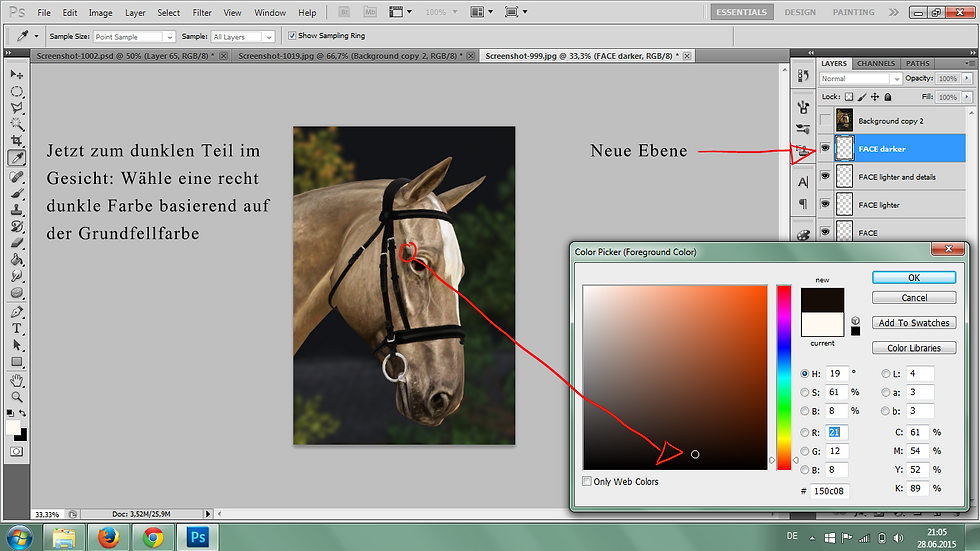


F A C E D E T A I L S (for beginners)
This tutorial is about detailing a horse's face with Photoshop, it can also be used for Gimp, but I personally recommand to use PS. It was drawn with a Wacom Intuos Pen graphic tablet, so it's possible your result won't look like mine.
It is not a tutorial for already good editers, it's more for extending editing skill of a beginner.
So, good luck and have fun!
F A C E D E T A I L S (advanced)
This video is about detailing a horse's face with Photoshop, it can also be used for Gimp, but I personally recommand to use PS. It was drawn with a Wacom Intuos Pen graphic tablet.
It is not a very well explained tutorial, it is more a kind of video from which you can learn a thing or two.
Activate the subtitle to read what I am doing.
Have fun!
H O R S E E Y E (for beginners and more)
This video is about editing a complete new eye for a horse with Photoshop, it can also be used for Gimp, but I personally recommand to use PS. It was drawn with a Wacom Intuos Pen graphic tablet.
It is a great tutorial to learn how to edit an eye. Also at the beginning it shows how a drawn eye should look like.
Take your tablet and pen and GO!
F A C E D E T A I L S (GERMAN)
This video is about detailing a horse's face with Photoshop, it can also be used for Gimp, but I personally recommand to use PS. It was drawn with a Wacom Intuos Pen graphic tablet.
It is not a very well explained tutorial, it is more a kind of video from which you can learn a thing or two.
Success!
F I L T E R S (for Photoshop)
These filters are my personal favorite ones to use. Ever noticed how Sims got a pretty bright and colorful scheme? These filters take out the strong contrasts and colors. There are four filters available right now; basic, basic (but less effect), sunset and rainy.
Use them like this:
Download the file, unpack it. Open PS, open the .psd-files you just downloaded. Click on 'File', 'Place...' and your picture you want to edit. DONE!


